Creating Simple Jewelry Sets: A Step-by-Step Guide

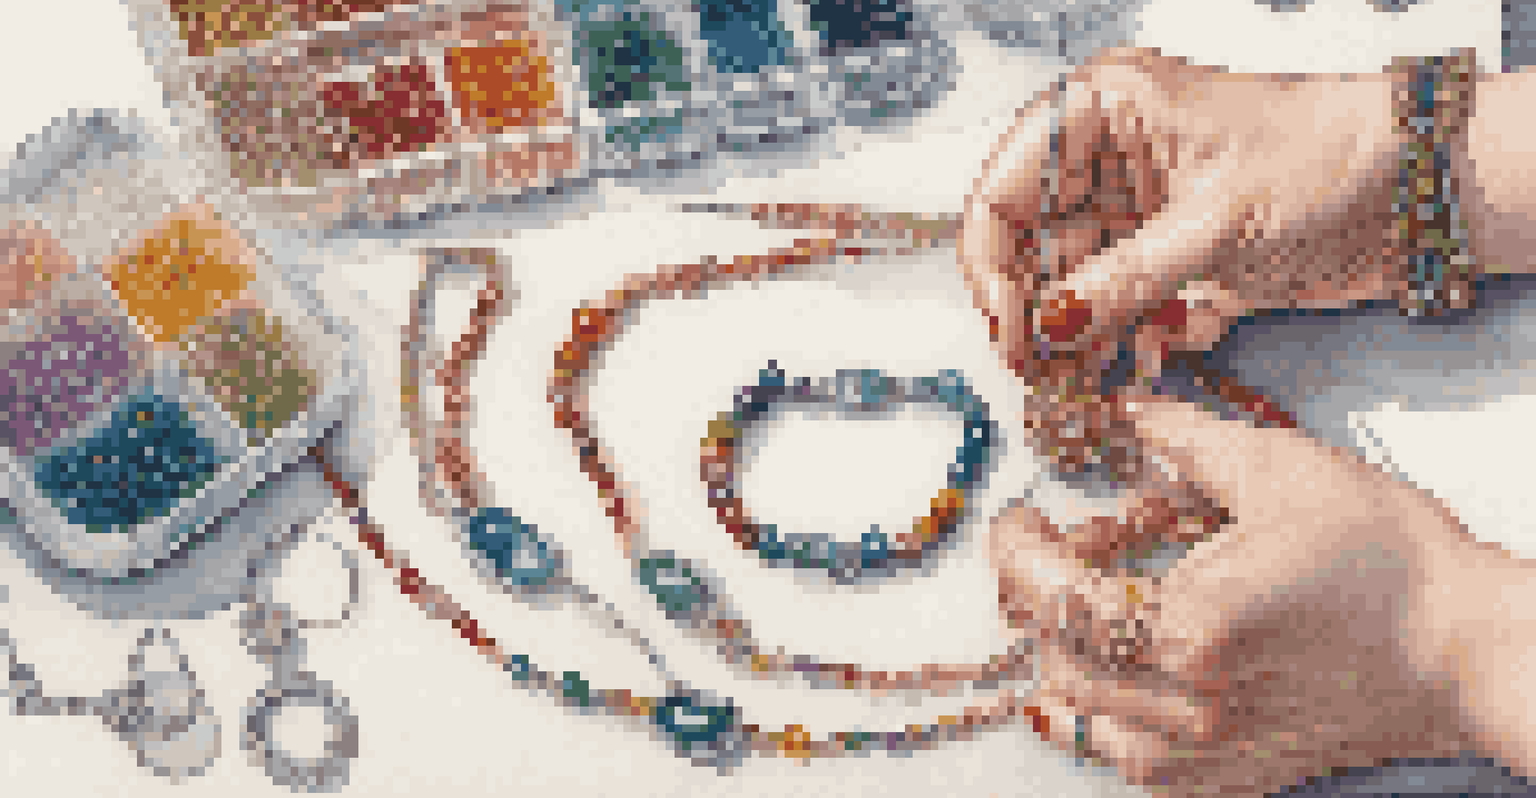
Gather Your Materials for Jewelry Making
Before diving into your jewelry creation, it's essential to gather all necessary materials. This includes beads, wires, clasps, and tools like pliers and scissors. Think of this step as setting up your kitchen before baking a cake; having everything within reach makes the process smoother.
Creativity is intelligence having fun.
You can find these materials at craft stores, online retailers, or even in your own home. Recycled items like old jewelry can often provide unique components for your new designs. Don't forget to consider your color palette and style preferences while choosing your materials.
Having a dedicated workspace can also enhance your creativity. A clean, organized area allows you to focus on your designs without distractions. Plus, it's easier to find those tiny beads when they're not lost in a cluttered mess!
Choose a Simple Design for Your Jewelry Set
When starting out, it's best to keep your designs simple. Think of classic styles like a matching necklace and earring set, which can easily elevate any outfit. A straightforward design not only builds your confidence but also helps you hone your skills.
You can sketch your ideas or look for inspiration online. Platforms like Pinterest are great for discovering trends and gathering ideas. Remember, simplicity can often lead to elegance, so don’t feel the need to overcomplicate your designs.
Gather Materials for Success
Collecting all necessary materials before starting enhances the jewelry-making process.
Once you have a design in mind, visualize how the pieces will work together. Consider how the colors, shapes, and sizes interact to create a cohesive look. This step is like planning a meal, where all components should complement each other.
Measure and Cut Your Materials Accurately
Accurate measurements are crucial in jewelry making, as they directly affect the fit and appearance of your pieces. Use a ruler or measuring tape to ensure that your wire or string is cut to the correct length. It's like measuring ingredients for a recipe; precision leads to a successful outcome.
Every artist was first an amateur.
For necklaces, consider how long you want the chain to fall. For earrings, think about how far you want them to dangle. Taking the time to measure carefully helps avoid mistakes that can lead to frustration later on.
Once measured, use sharp scissors or wire cutters for a clean cut. A clean edge makes it easier to work with and ensures a polished finish. Remember, a little extra time spent on this step can save you from redoing a piece later!
Assemble Your Jewelry Pieces Step by Step
Now comes the fun part—assembling your jewelry! Start by laying out your materials according to your design. This visual arrangement helps you see how everything will come together, much like organizing toppings before building a pizza.
Begin stringing your beads onto the wire or thread, following your design closely. If you're creating a necklace, alternate larger beads with smaller ones for visual interest. Take your time with this process; there's no rush to finish.
Start with Simple Designs
Choosing straightforward designs helps beginners build confidence and refine their skills.
Once all pieces are strung, check the length and overall look before securing any knots or closures. This step allows you to make adjustments easily. Just like a final taste test before serving a meal, this is your chance to ensure everything is perfect!
Secure Your Jewelry Components Properly
After assembling your jewelry pieces, it's essential to secure them properly to ensure longevity. For beaded pieces, use a crimp bead to hold the beads in place. This step is similar to tying shoelaces; a secure knot prevents everything from falling apart.
If using clasps, make sure they are firmly attached to the ends of your jewelry. Check that they function smoothly to avoid any hassles while wearing. A well-secured clasp is like a sturdy door latch; it keeps everything intact.
Don’t forget to double-check your work! Inspect every piece for any loose ends or weak spots. Taking this extra moment for quality control can save you from future repairs and enhance the durability of your creation.
Add Personal Touches to Your Jewelry Set
Personalizing your jewelry set can truly make it unique. Consider adding charms, initials, or even special symbols that have meaning to you. Just like a signature on a painting, these touches make your work stand out.
You can also play with different textures and materials to enhance the overall aesthetic. Mixing metals or incorporating natural elements like stones can add depth and interest to your set. It’s all about expressing your personal style.
Add Personal Touches
Incorporating unique elements like charms or textures can make your jewelry truly one-of-a-kind.
Remember, no one else has your vision, so don’t be afraid to experiment. This is your chance to let your creativity shine, just like an artist who uses vibrant colors to evoke emotion.
Show Off Your Beautiful Jewelry Sets
Once your jewelry set is complete, it's time to show it off! Whether you wear it yourself or gift it to someone special, sharing your creation brings joy. Think of it as unveiling a masterpiece; your hard work deserves recognition.
You can also take photos of your jewelry to share on social media. Platforms like Instagram and Facebook allow you to connect with other jewelry enthusiasts and showcase your creativity. Plus, it can inspire others to try their hand at jewelry making!
If you feel adventurous, consider selling your creations online. Websites like Etsy offer a platform for crafters to reach a wider audience. Just remember, every piece you create tells a story, so let your passion shine through in your craftsmanship.