The Basics of Leather Cutting: Techniques for Precise Cuts

Understanding Leather Types and Their Characteristics
Before diving into leather cutting, it's crucial to understand the different types of leather available. Full-grain leather, for instance, is known for its durability and natural grain, making it a favorite for high-quality projects. On the other hand, suede offers a soft texture but can be more challenging to cut due to its fibrous nature.
Good tools make good work.
Each type of leather has its unique properties that affect how it should be handled during cutting. For example, thicker leathers require sharper tools and more pressure, while thinner ones may tear easily if not cut with precision. Understanding these characteristics not only helps you choose the right leather for your project but also informs your cutting techniques.
Ultimately, selecting the right leather type is the first step toward achieving clean, precise cuts. Consider your project's requirements and match them with the appropriate leather. This foundational knowledge sets the stage for successful leather cutting.
Essential Tools for Accurate Leather Cutting
Having the right tools is vital for achieving precise cuts in leatherwork. Essential tools include a rotary cutter, utility knife, and a straightedge or ruler. Each of these tools serves a specific purpose, whether it's making long, straight cuts or intricate shapes.
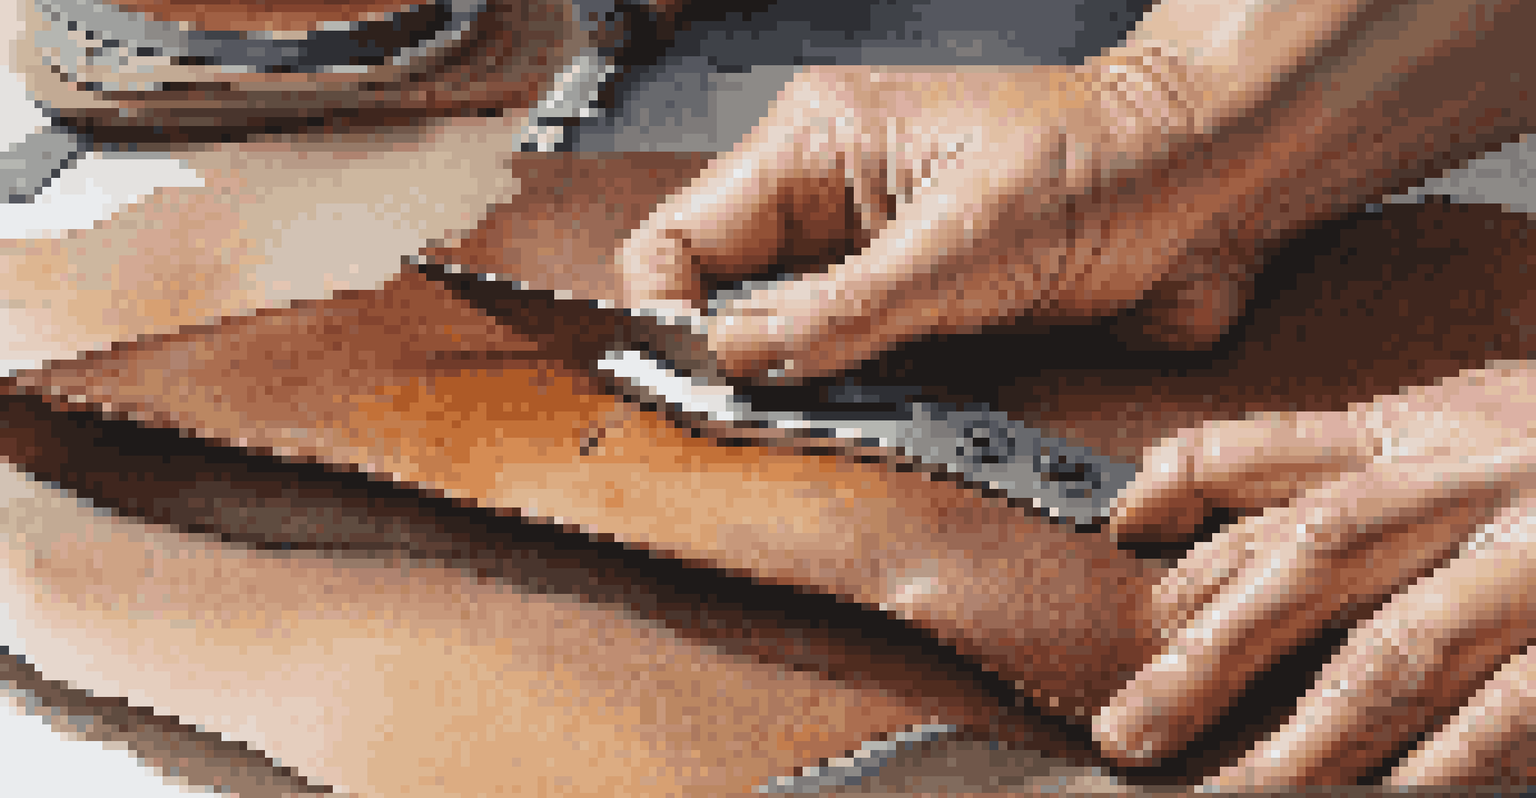
A rotary cutter is particularly effective for cutting through thicker materials, while a utility knife offers more control for detailed work. Additionally, a self-healing cutting mat not only protects your work surface but also prolongs the life of your blades. Investing in quality tools can make a significant difference in the ease and accuracy of your cuts.
Know Your Leather Types
Understanding the characteristics of different leather types is essential for choosing the right material and cutting techniques.
Remember, the right tool for the job can save you time and frustration. Familiarize yourself with each tool's strengths and weaknesses, and practice using them to develop your skills. This knowledge will enhance your cutting precision and overall leatherworking experience.
Preparing Your Workspace for Leather Cutting
A well-prepared workspace is crucial for effective leather cutting. Start by ensuring your cutting surface is clean, flat, and well-lit. A clutter-free area allows you to focus on your cuts without distractions, reducing the risk of mistakes.
Measure twice, cut once.
Additionally, consider organizing your tools within arm's reach to streamline your workflow. This not only saves time but also minimizes the chances of accidents while searching for tools. A dedicated workspace enhances your efficiency and promotes a safer cutting environment.
Lastly, ensure you have appropriate safety gear like cutting gloves to protect your hands. Taking these simple steps can dramatically improve your cutting experience, leading to more precise and confident cuts.
Measuring and Marking Leather for Accurate Cuts
Accurate measurements are the backbone of precise leather cutting. Use a ruler or measuring tape to determine the dimensions of your pieces before cutting. Taking the time to measure twice can save you from costly mistakes later on.
Once measurements are established, marking the leather is the next step. Tailor's chalk or a fine-point marker works well for this purpose, as it allows for clear lines that won't damage the leather. Clear markings ensure you can follow your intended cuts accurately, leading to a professional finish.
Essential Cutting Tools
Using the right tools, such as a rotary cutter and utility knife, significantly improves accuracy and ease in leather cutting.
Incorporating this practice into your cutting routine will enhance your precision. Remember, careful measuring and marking create a solid foundation for your cutting process, ultimately elevating the quality of your leather project.
Cutting Techniques for Straight and Curved Lines
Mastering both straight and curved cuts is key to successful leatherwork. For straight cuts, using a straightedge provides the guidance needed to maintain a clean line. Apply consistent pressure while moving your cutter along the edge for the best results.
Curved cuts require a different approach; here, it's essential to move slowly and steadily. Instead of forcing the cutter, allow it to follow the natural curve of the leather. This technique minimizes the risk of jagged edges and ensures a smooth finish.
Practicing these cutting techniques on scrap leather can build your confidence. The more familiar you become with the motions of cutting, the more precise your results will be, ultimately enhancing the quality of your projects.
Avoiding Common Mistakes in Leather Cutting
Even seasoned leatherworkers can fall prey to common cutting mistakes. One frequent issue is using dull blades, which can lead to uneven edges and tearing. Regularly changing your blades is essential for maintaining precision in your cuts.
Another common mistake is rushing the cutting process. It's easy to get excited and want to see results quickly, but haste often leads to errors. Take your time to measure, mark, and cut, ensuring you maintain focus on each step.
Measure and Mark Carefully
Accurate measuring and marking are crucial steps that lay the foundation for precise leather cuts and enhance the overall quality of your projects.
Learning from these mistakes can significantly improve your leather cutting skills. By acknowledging and addressing common pitfalls, you can enhance your craftsmanship and produce higher quality leather goods.
Finishing Touches: Edges and Cleanup After Cutting
After cutting your leather pieces, the finishing touches can make all the difference. Start by trimming any rough edges to achieve a clean, polished look. Using a rotary tool or sandpaper can help smooth out any imperfections.
Additionally, consider applying an edge finish to enhance the durability and appearance of your leather. This step not only protects the edges from wear but also adds a professional touch to your project. It's the small details that can elevate your work from ordinary to extraordinary.
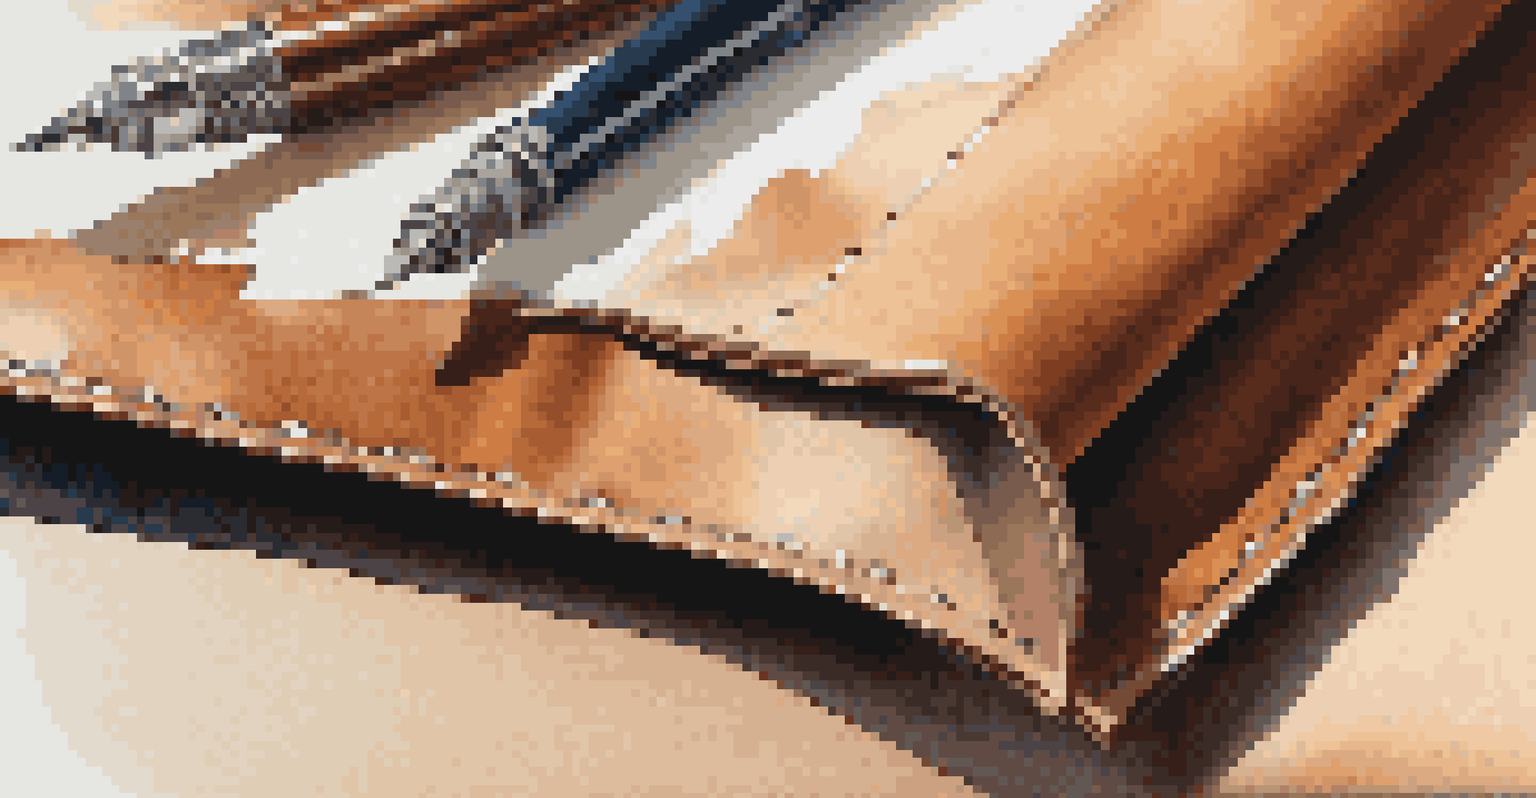
Finally, don’t forget to clean your workspace after cutting. A tidy area not only promotes safety but also prepares you for your next project. By taking these finishing steps, you ensure your leather goods are not just functional but also visually appealing.