A Beginner's Guide to Scale Model Painting Techniques
Understanding the Basics of Scale Model Painting
Before diving into painting, it's crucial to understand what scale modeling is all about. Scale models are miniature representations of real-life objects, and painting them accurately can enhance their realism. Whether you're working on cars, planes, or figures, the right techniques can make your models stand out.
The secret to creativity is knowing how to hide your sources.
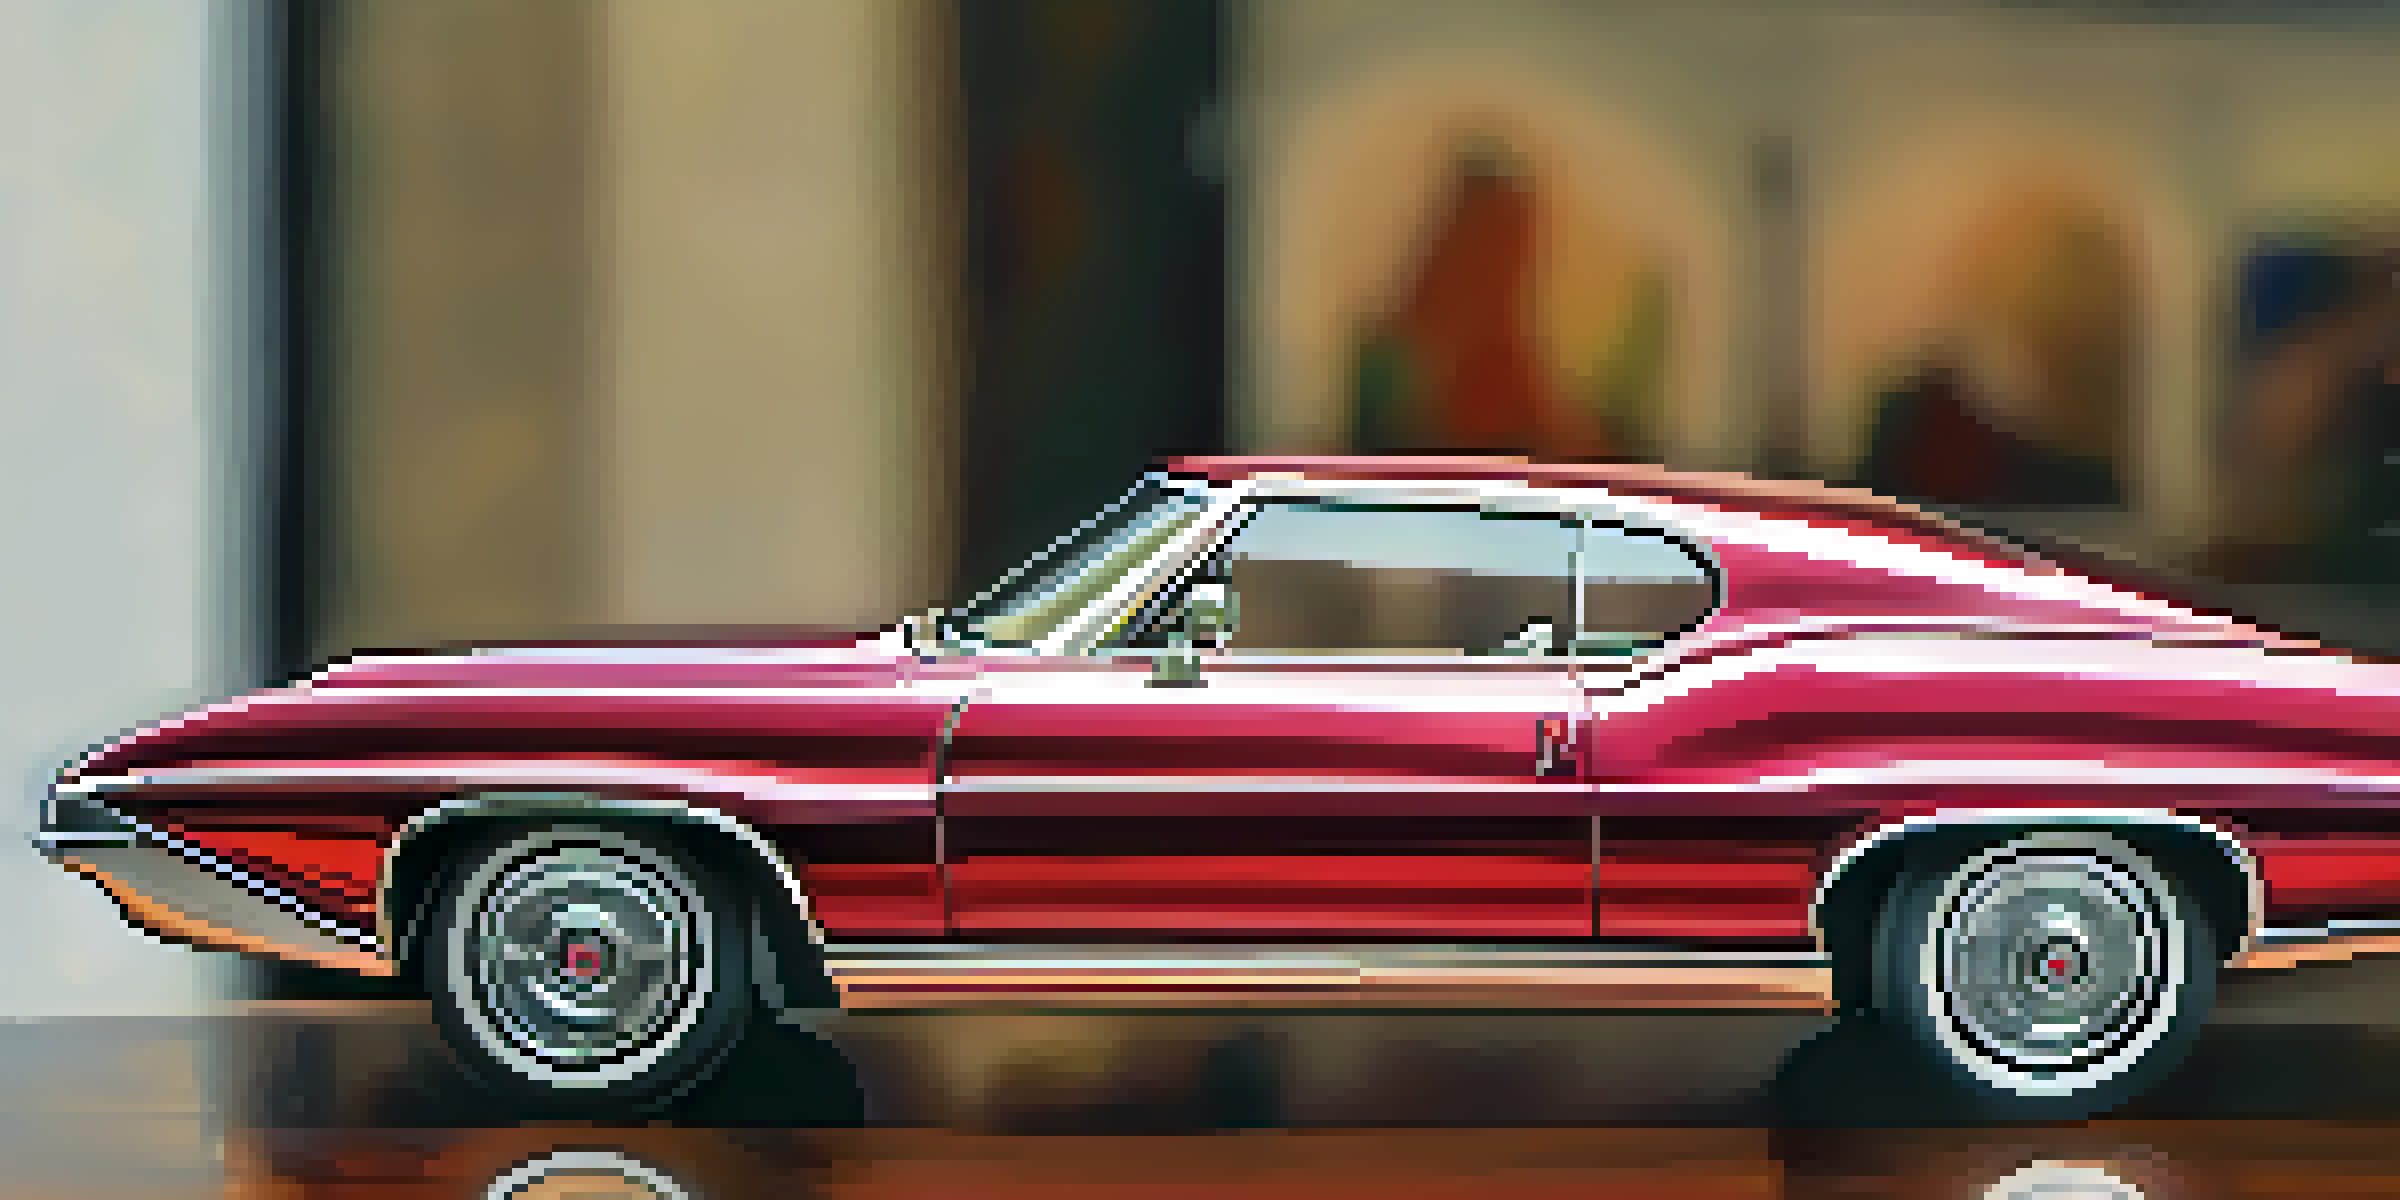
One of the first things to grasp is the concept of scale. This refers to the size ratio of the model compared to the actual object. Knowing your model's scale can inform your choice of colors and details, as a 1:24 scale car will need different considerations than a 1:72 scale airplane.
Lastly, don't underestimate the importance of preparation. A well-prepared surface will hold paint better and yield a smoother finish. Clean your model thoroughly, and consider using a primer to create an ideal base for your paint.
Choosing the Right Tools for the Job
Having the right tools can make a world of difference in your painting journey. Basic tools include brushes, airbrushes, and paint types. Each tool has its own strengths, and knowing when to use them can elevate your painting skills.
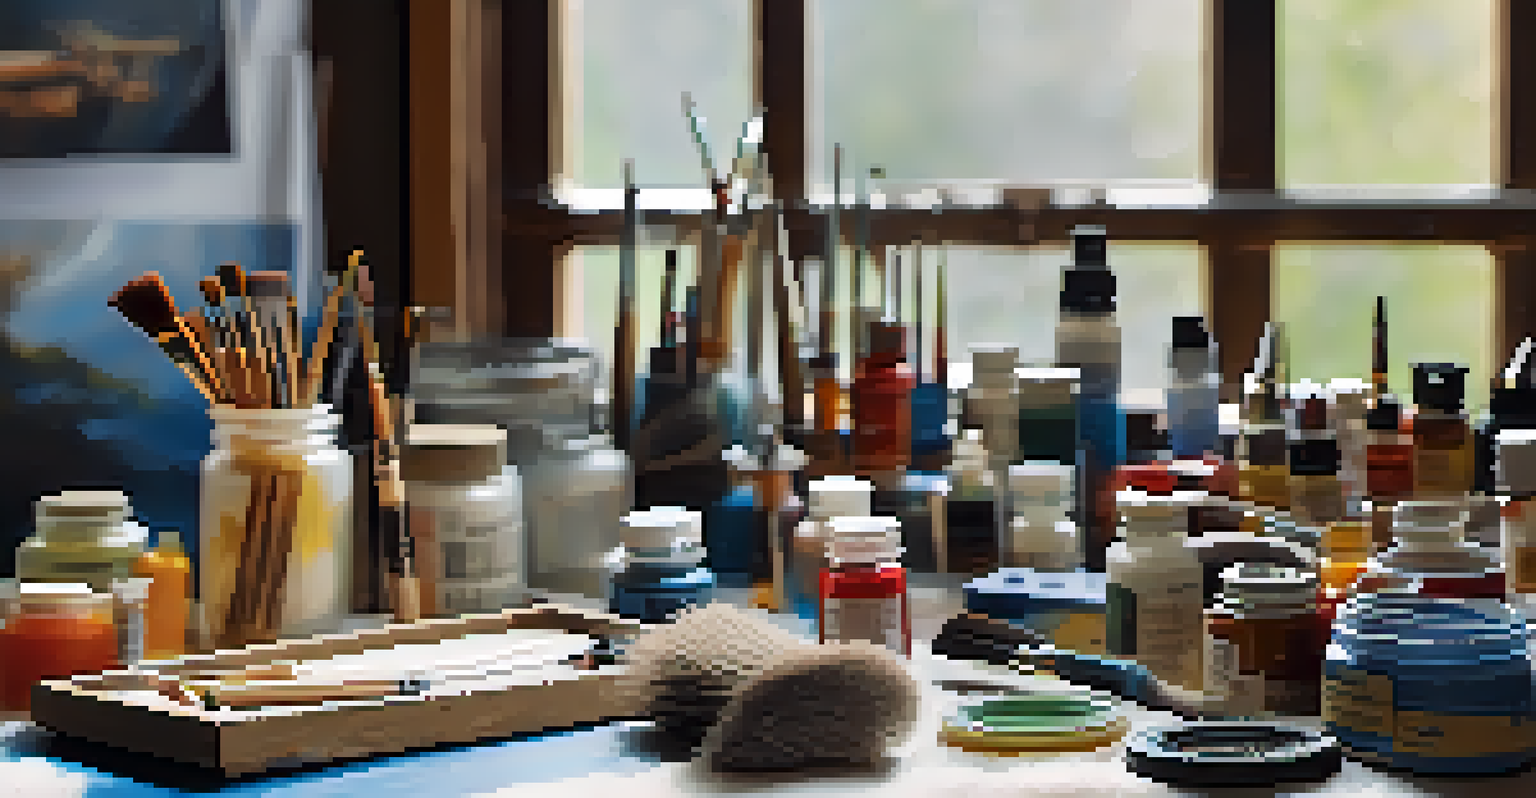
For instance, if you’re painting fine details, a set of fine-tipped brushes can help you reach those tiny areas. On the other hand, if you’re looking to cover larger surfaces or create gradients, an airbrush might be the way to go. The choice between brushes and airbrushes often depends on the level of detail and finish you desire.
Importance of Surface Preparation
A well-prepared surface ensures better paint adhesion and a smoother finish for your scale models.
Additionally, don’t forget about the importance of paint quality. Investing in high-quality paints can lead to better results and more vibrant colors. You may also want to consider paint types, such as acrylics, enamels, or oils, as each behaves differently and requires specific techniques.
Surface Preparation: The Key to a Great Finish
Surface preparation is a crucial step that many beginners overlook. A clean and smooth surface is essential for paint adhesion and can significantly affect the overall look of your model. Start by washing your model with warm soapy water to remove any oils or dust.
Art is not what you see, but what you make others see.
Once clean, sanding the surface can help achieve a smoother finish. Use fine-grit sandpaper to gently sand down any imperfections. This step is especially important if you’re working with resin or plastic kits, which may have mold lines or rough spots.
After sanding, applying a primer can further enhance the surface. Primers not only provide better paint adhesion but also help in revealing any flaws that need attention. Taking the time to prepare your model can save you headaches later on.
Mastering Basic Painting Techniques
Now that your model is prepped, it’s time to dive into painting techniques. One of the most fundamental techniques is base coating, where you apply an even coat of paint to cover the entire model. This base layer sets the stage for additional details and colors.
Layering is another technique that can add depth and dimension to your models. By applying multiple thin layers of paint, you create a richer color and often achieve a more realistic finish. Remember, patience is key here; allowing each layer to dry before applying the next will lead to better results.
Choosing the Right Tools Matters
Using appropriate brushes and paints can significantly enhance your painting technique and overall results.
Don’t forget about dry brushing, a technique used to highlight raised surfaces. After your base coat, take a lighter shade and lightly brush it over the raised areas. This adds contrast and brings out the details, making your model truly pop.
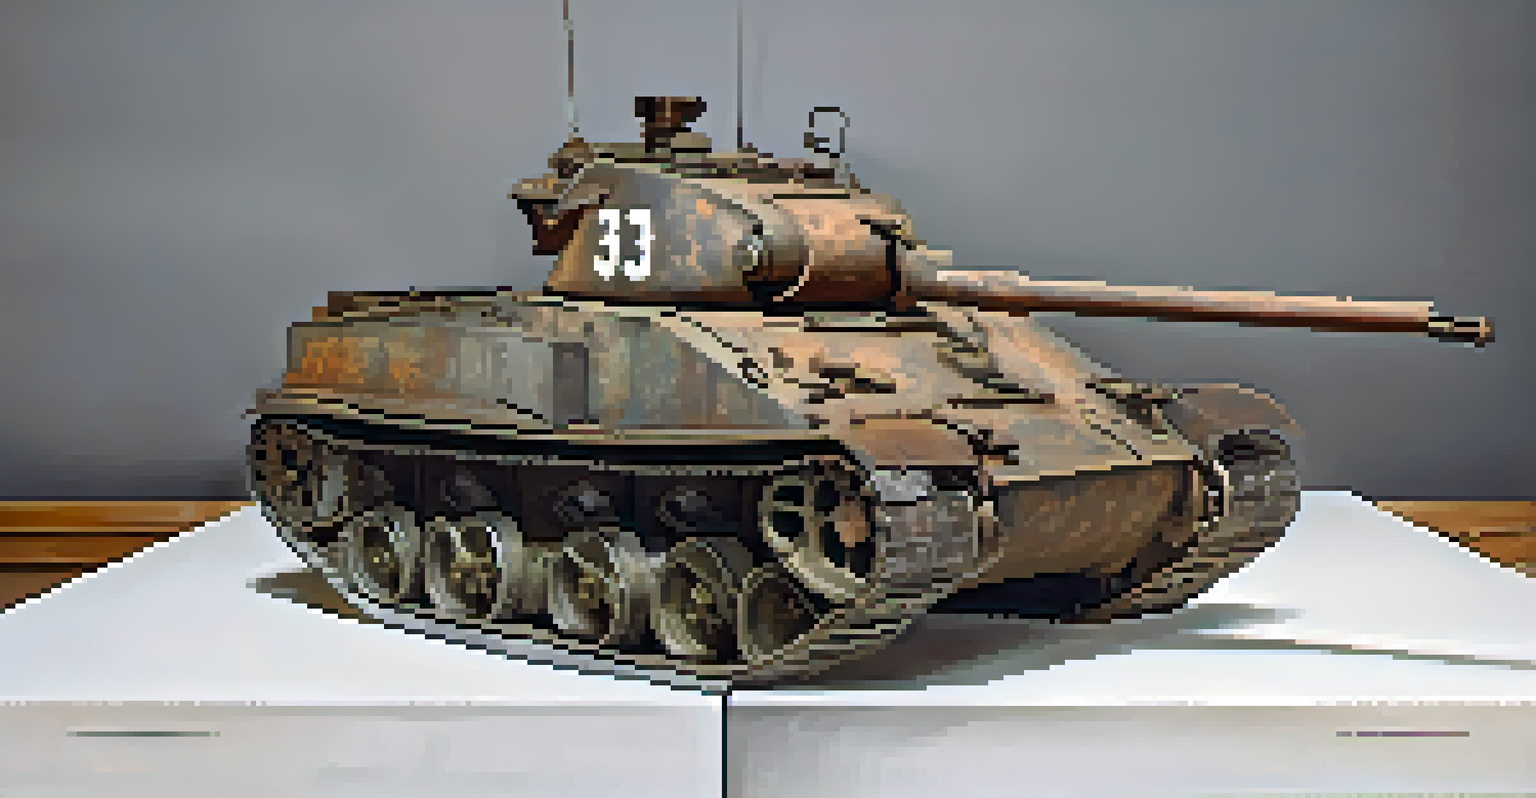
Adding Realism with Weathering Techniques
Weathering is the art of adding realism to your scale models by mimicking the effects of aging and exposure. This can include techniques such as washes, pigments, and chipping to create a lived-in look. It's all about giving your model an authentic story.
A wash is a thin, diluted paint applied over your base coat that settles into the crevices, highlighting details. This technique can make your model appear more dynamic and visually appealing. Using dark colors for shadows and lighter colors for highlights can create a striking contrast.
Chipping, on the other hand, simulates paint wear and tear. You can achieve this look by using a fine brush to apply a lighter color on the edges where paint would naturally wear off. This technique adds character and tells a story about your model’s journey.
Sealing and Finishing Your Painted Model
Once you're satisfied with your paint job, it's time to seal your model. Sealing not only protects your hard work but also enhances the finish. You can choose between matte, satin, or gloss finishes, depending on the look you want to achieve.
A matte finish provides a non-reflective surface that works well for many models, while a gloss finish can accentuate colors and details, making them appear more vibrant. Satin finishes offer a middle ground, giving a slight sheen without being overly shiny.
Techniques for Realistic Painting
Mastering techniques like layering and weathering can add depth and authenticity to your scale models.
Applying a clear coat after painting can protect your model from dust and damage. Remember to apply thin, even coats and allow each layer to dry fully before adding additional coats. This final step ensures your model remains beautiful for years to come.
Troubleshooting Common Painting Issues
Even the most seasoned painters face challenges now and then. Common issues include paint pooling, uneven coverage, or paint chipping during handling. Recognizing these problems is the first step in learning how to avoid them in the future.
If you notice paint pooling, try adjusting your brush technique or using thinner layers. Patience is vital here; rushing can lead to unsatisfactory results. Remember, it's better to apply multiple thin layers than one thick one.
For uneven coverage, ensure your paint is well-mixed and consider adding a bit of water or thinner. This can help the paint flow more smoothly. Lastly, if your paint chips, check if you’ve applied a protective seal. If not, applying a clear coat can help prevent further damage.